
By now, everyone has come across the terms Machine Learning, Artificial Intelligence, Neural Nets, etc. In this article, we will try to give you a glimpse of Machine Learning as part of our own learning experience while working for a large Canadian corporation. Before we delve into the topic, here are some preliminaries.
Who needs to know about Machine Learning?
Anyone with an interest in learning about Machine Learning and exploring its benefits.
Do I need to have any prior knowledge about Machine Learning?
Not at all.
What Programming Language Do I Need To Know?
We will show a sample code in R.
Let’s get started…
So what is Machine Learning in simple terms?
It’s the “art” of predicting an outcome (whatever that may be) by applying statistical methods to some historical data (called training data). This process is enhanced through training, that is, by providing more training data.
Here is what a sample Machine Learning process might look like:
It takes a lot of practice and mastery before you can come up with a good Machine Learning algorithm that predicts an outcome within reasonable bounds. In this article, we will show you some of the basics with simple examples.
There are two main types of outcomes from a Machine Learning algorithm:
- Regression
- Classification
When your outcome range is continuous, we call it Regression. For example, if you’re trying to predict sales for a product, it can be any decimal number. That’s a continuous range. [Domain & Range Refresher]
When the outcome range is a set of discrete values ({pass, fail}, {yes, no} etc.), we call it Classification. For example, let’s say you’re trying to predict customer churn. There are only two possible outcomes – churn and no-churn.
This article will focus on Regression.
Example #1 – Simple Linear Regression: Predicting salary for a new hire
Let’s say you’re hiring a new front-end developer for your start-up. You have an idea about how much salary you should offer that new hire. But you don’t want to make an offer that’s too low or too high. So let Simple Linear Regression help you decide. This is probably the simplest form of Machine Learning algorithm you can use.
Step 1 – Obtain training data. This could be an extract from job sites or government HR data. In its trivialized form, your training data could look like this:
Step 2 – Cleanse your data, so that it looks something like the table above. It shows years of experience and a Front-End Developer salary.
Step 3 – Split this data into a training set and a test set. Let’s say all the odd-numbered rows become your training set and all the even number of rows become your test set. You can be creative here.
Let’s pause for a moment here!
You might be wondering, “Why Simple Linear Regression?”. The answer is in your data. Here are a few key things to note:
- You have only one independent variable in your data (Years of Experience). You need not worry about correlation.
- The dependent variable (Salary) follows a normal distribution.
- If you plot the data, you can observe a linear relationship between years of experience and salary. As experience goes up, salary increases.
Step 4 – Using R (or Python) create a Regressor and a Predictor.
A Regressor is basically your model. A Predictor takes the Regressor and the years of experience of which you’re trying to predict a salary.
In R, it looks like the following:
# Simple Linear Regression
# Importing the dataset
dataset = read.csv('Salary_Data.csv')
# Splitting the dataset into the Training set and Test set
# install.packages('caTools')
library(caTools)set.seed(123)
split = sample.split(dataset$Salary, SplitRatio = 2/3)
training_set = subset(dataset, split == TRUE
test_set = subset(dataset, split == FALSE)
# Fitting Simple Linear Regression to the Training set
regressor = lm(formula = Salary ~ YearsExperience,data = training_set)
# Predicting the Test set results
y_pred = predict(regressor, newdata = test_set)
# Visualising the Training set results
library(ggplot2)
ggplot() + geom_point(
    aes(
        x = training_set $YearsExperience,
        y = training_set $Salary
    ),
    colour = 'red'
) + geom_line(
    aes(
        x = training_set $YearsExperience,
        y = predict(
            regressor,
            newdata = training_set colour = 'blue'
        ) + ggtitle('Salary vs Experience (Training set)') + xlab('Years of experience') + ylab('Salary') # Visualising the Test set results
        library(ggplot2) ggplot() + geom_point(
            aes(x = test_set $YearsExperience, y = test_set $Salary),
            colour = 'red') + geom_line(aes(
                x = training_set $YearsExperience,
                y = predict(regressor, newdata = training_set)
            ),
            colour = 'blue'
        ) + ggtitle('Salary vs Experience (Test set)') + xlab('Years of experience') + ylab('Salary')
Step 5 – Test it out! Now that you have your Regressor and Predictor, see how well your model fits your test data.
Here is our Training Set plot along with our model (i.e. the blue line)
Here is our Test Set plotted along with our model
The prediction
Since the model fits our test set quite well, we can now use it to predict a salary for our new developer who has 6.5 years of experience. We estimate that to be approximately $89,000.
Suggested refinement in the training set:
Compensation data can be obtained from job sites or gov’t data, however, organizations often need to balance compensation as part of the overall retention strategy for an organization and compare job-specific pay with internal benchmarks and resources. This is where multiple regression comes into play, where multiple internal and external datasets are required to approximate an output.
Example #2 – Multiple Linear Regression: How to allocate your budget
With Simple Linear Regression, you just scratched the surface of the Machine Learning universe. Things get a little bit more interesting when you have more than one independent variable. Let’s say you’re launching a new business or a product and you have to decide how to spend your money between R&D, Marketing, and Administration. The training set looks like the following:
The data is from three states where our pilot product was launched – New York, California, and Florida.
Independent variables here are:
- R & D spend
- Administration cost
- Marketing spend
- State
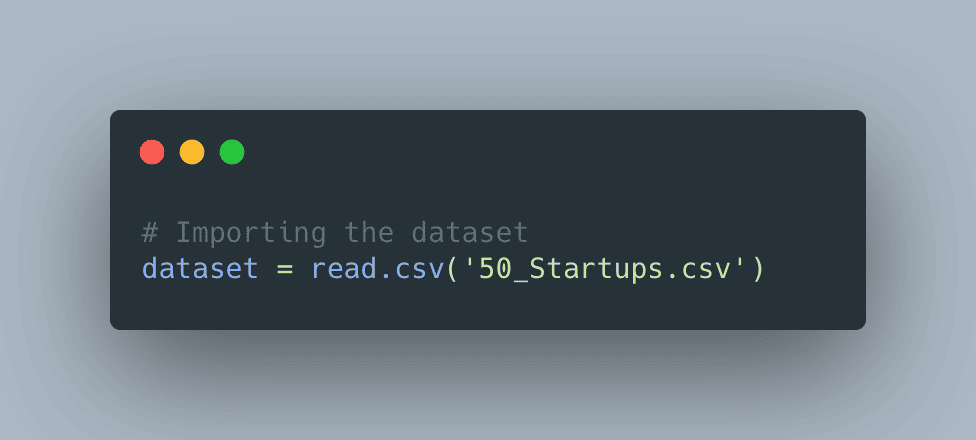
Step 1 – Read the data
# Encoding categorical data
dataset$State =
  factor(dataset$State,levels = c('New York', 'California', 'Florida'),labels = c(1, 2, 3))
Step 3 – Split the dataset into training and test sets
Note: Here we are using a R package called caTools. To install caTools, uncomment the first line.
        # install.packages('caTools')
        library(caTools)
        set.seed(123)
        split = sample.split(dataset$Profit, SplitRatio = 0.8)
        training_set = subset(dataset, split == TRUE)
        test_set = subset(dataset, split == FALSE)
Step 4 – Creating the Regressor
We are using the R method lm. Read more about lm.
# Fitting Multiple Linear Regression to the Training set # Long format is: # formula = Profit ~ R.D.Spend + Administration + Marketing.Spend + State # We are using the equivalnt short format regressor = lm(formula = Profit ~ ., data = training_set)
# Fitting Multiple Linear Regression to the Training set
# Long format is:
# formula = Profit ~ R.D.Spend + Administration + Marketing.Spend + State
# We are using the equivalnt short format
regressor = lm(formula = Profit ~ .,data = training_set)
Step 5 – Predict the profit in the test set
y_pred = predict(regressor, newdata = test_set)Step 6 – Use Backward Elimination to create an optimal model
The idea is to take the model from above and remove one independent variable at a time and test the model. We keep doing this until we find an optimal model.
        # Building the optimal model using Backward Elimination
        # Note we are taking the entire dataset and NOT the training set =>
        # simply to increase accuracy of the model.
        regressor = lm(formula = Profit ~ R.D.Spend +
                                          Administration +
                                          Marketing.Spend +
                                          State,
                        data = dataset)
        summary(regressor)
        # Removing State based on regression summary from the previous step
        regressor = lm(formula = Profit ~ R.D.Spend +
                                          Administration +
                                          Marketing.Spend,
                        data = dataset)
        summary(regressor)
        # Removing Administration based on regression summary from the previous
        # step
        regressor = lm(formula = Profit ~ R.D.Spend + Marketing.Spend,
                       data = dataset)
        summary(regressor)
        # Removing Marketing.Spend based on regression summary from the previous
        # step
        regressor = lm(formula = Profit ~ R.D.Spend,
                        data = dataset)
        summary(regressor)
How to interpret the summary
When you run the line of code summary(regressor), you get something like this:
The last two columns under the section marked “Coefficients”, give you the P-value and the Statistical Significance.
The lower the P-value is, the greater impact that independent variable is going to have on the dependent variable (Profit in our case). A general rule of thumb is that if P-value for a coefficient is less than 0.05 (or 5%), it is going to be statistically significant. If you look at the last column, it shows two rows with three asterisks (***). It’s a quick way to check for statistical significance. Based on that, R & D spending is the only factor that has a strong impact on profit.
Tip: You can simply remove all other columns (Administration, Marketing Spend, State) from your original dataset and convert this problem from Multiple Linear Regression to Simple Linear Regression.
Step 7 – Testing our model
Step 5 above gave us our prediction vector (y_pred). If you view the contents of this vector, you will see the following.
These are the predicted values for the corresponding row in our test set. Let’s compare how our predicted values match the real Profit figures.
Fairly accurate!
Summary
These are obviously very trivial “Hello World” type examples. In real-life, data is rarely this clean and requires a lot of wrangling and subject matter expertise. However, the underlying concepts remain the same. You create a model through the use of training data and then keep tweaking your model and changing your test set until desired performance is achieved. It’s hard (if even possible) to get a model which can predict with more than 90% accuracy. Even a 75% accuracy is considered very good in most cases. We hope you got some value out of this. Please check our blog often for more articles like this.
Acknowledgments
The examples shown in this article are from https://www.superdatascience.com/pages/machine-learning